There has been a critical error on this website is a message that WordPress would display each time your site cannot load all the scripts and therefore can’t function properly.
Although it looks and sounds daunting, the most important thing you can do in this situation is to remain calm and proceed to fix the error step by step, as shown in the following paragraphs.
There Has Been a Critical Error on This Website
Oftentimes named The white screen of death, the error will display a generic error message like this to you and all your visitors when you try to load the website:
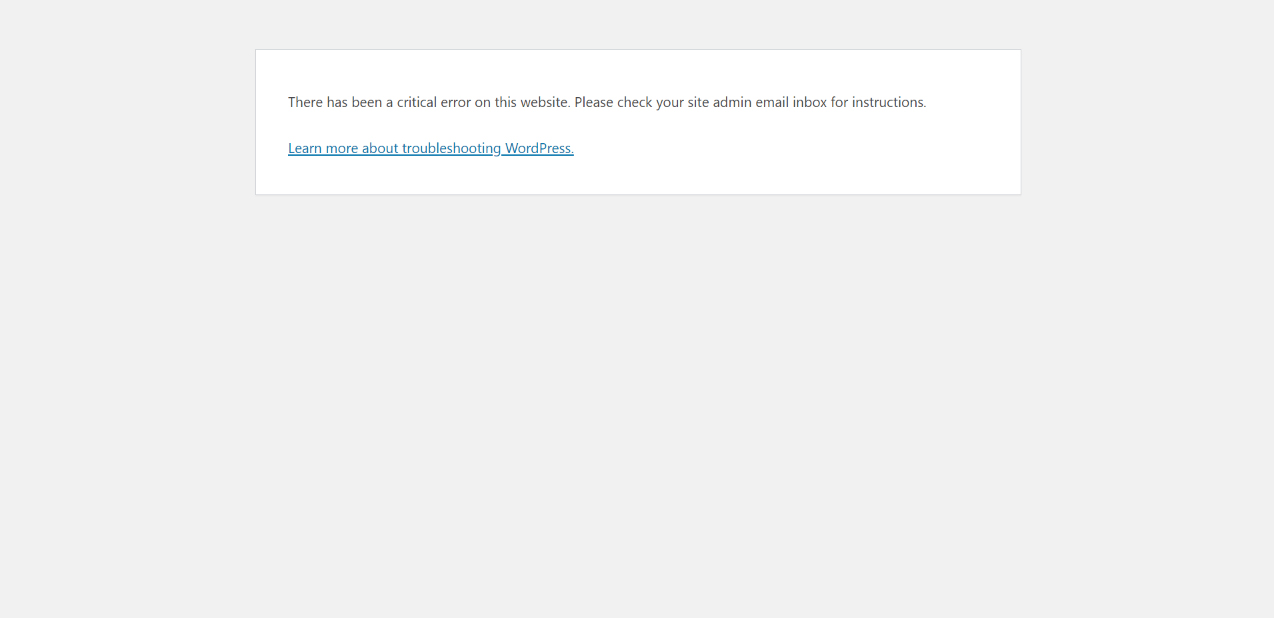
This error is caused by the malfunctioning of a WordPress plugin, script, or code that prevents the platform from functioning properly.
In this case, there are several steps you can undertake to fix the error and have your website up and running:
Use a Backup Copy of WordPress
Deactivate All WordPress Plugins
Switch to the Default WordPress Theme
Clear WordPress Cache
Sometimes too many cached files might result in system malfunction. Before proceeding into the technical steps, try to clear your site cache and see whether this will fix the issue. Also, if you want to know more, check out what WordPress cache is and why is it important.
Use a Backup Copy of WordPress
Using backups for your website is a great way of avoiding technical issues across your pages. If you have already backed up your site, try to use the backup copy.
If you are not familiar with the process, then read what backup is and why is it useful for your project.
Deactivate All WordPress Plugins
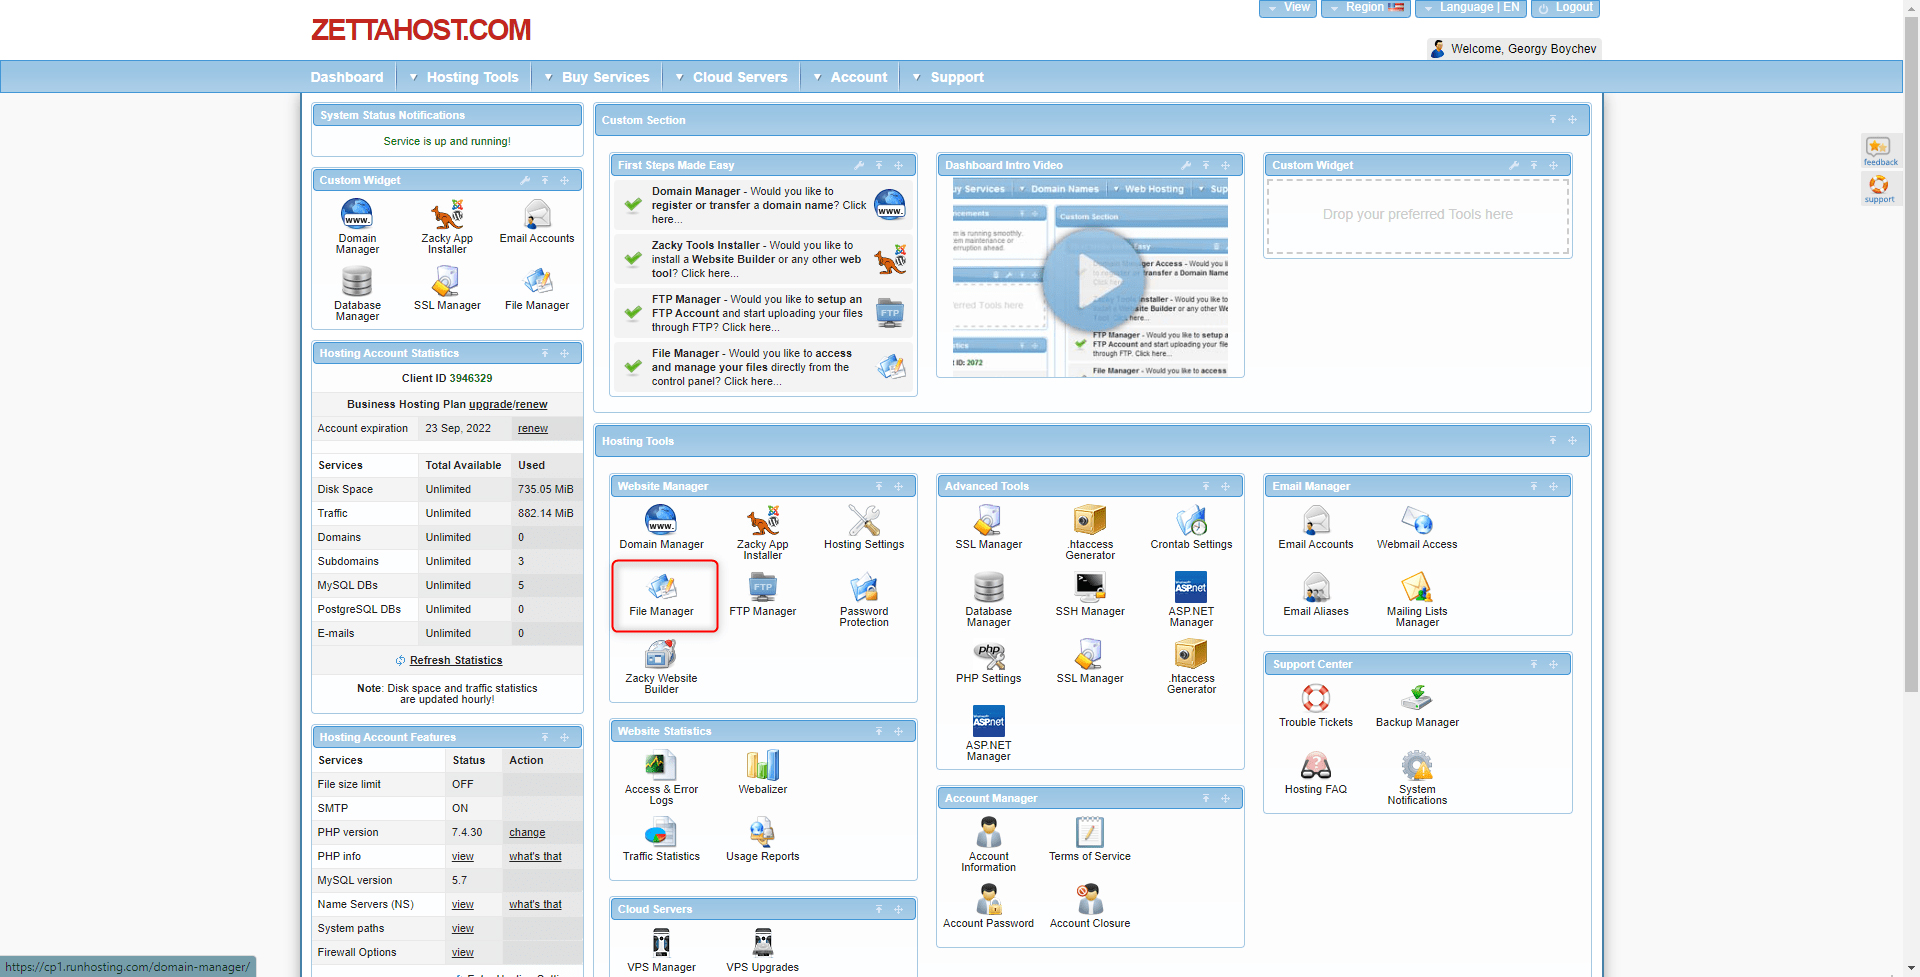
Since you are unable to enter your WordPress admin panel, you should enter the ZETTAHOST hosting panel and deactivate all plugins manually.
To do so, when in the panel, go to File Manager:
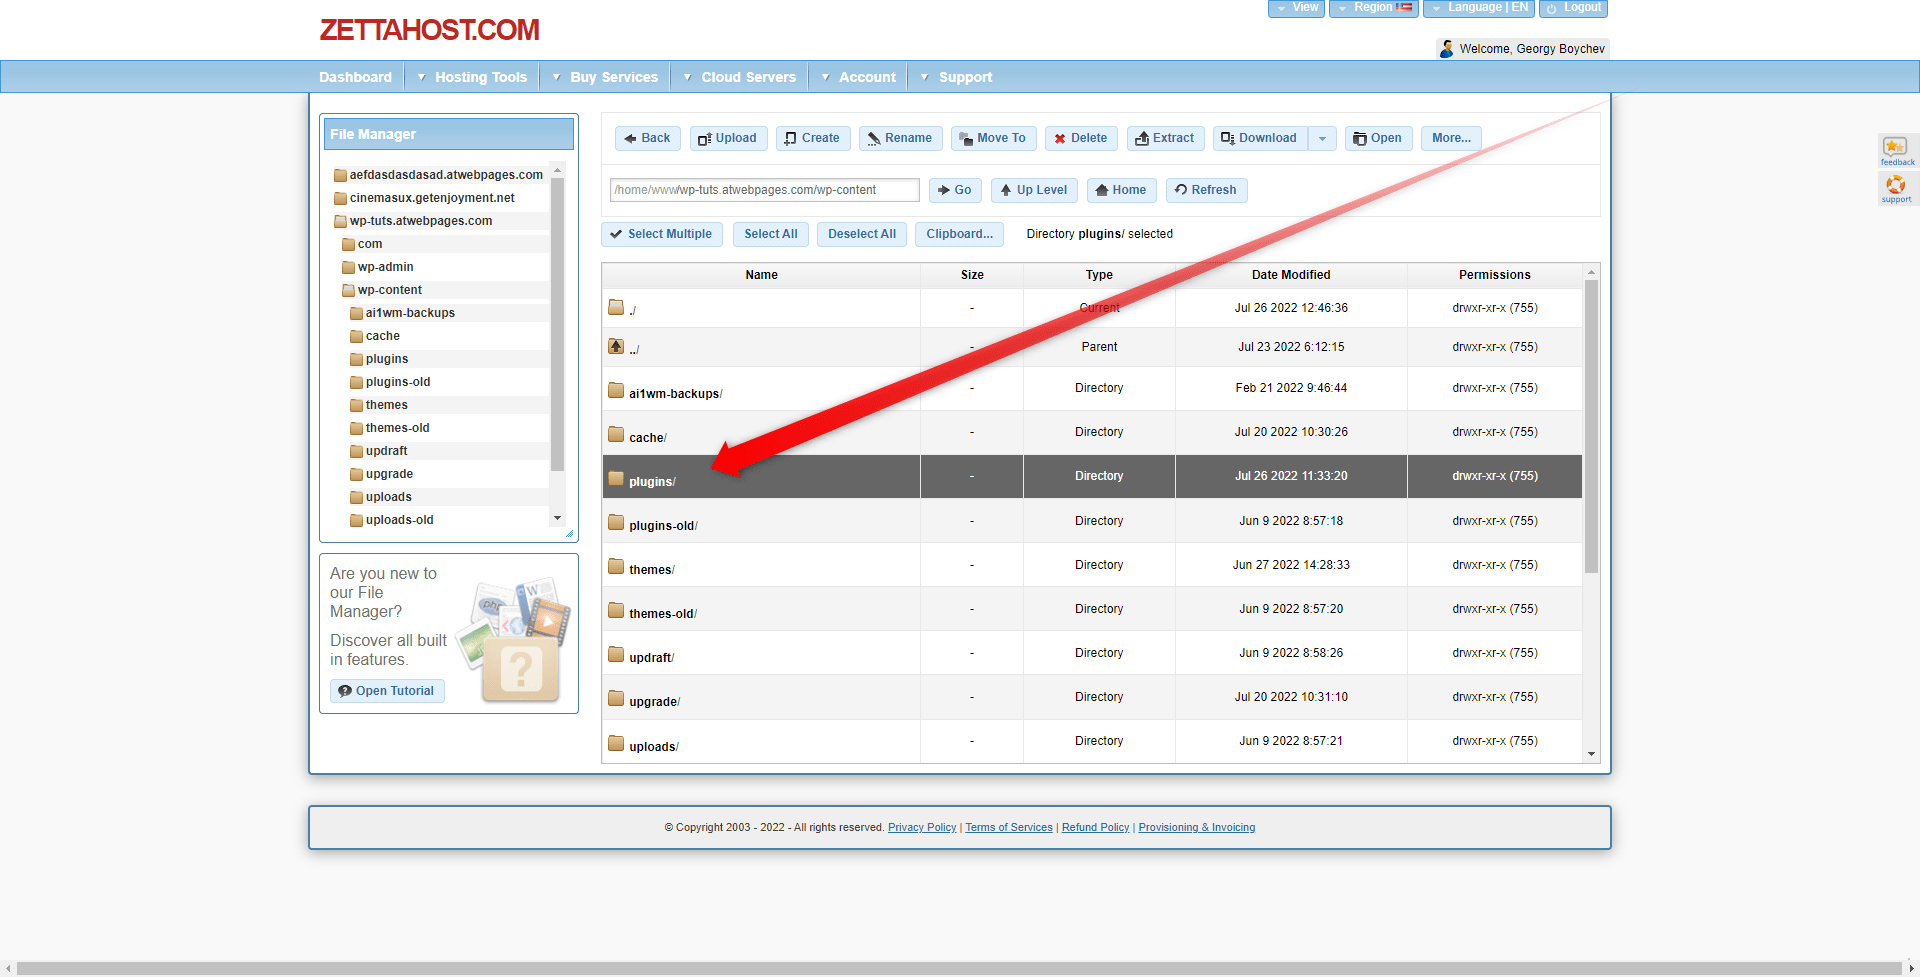
From there, search for the root folder of your website. To do so, simply open the folder with the same name as your website, and from there go to wp-content and look for plugins:
Now, right-click the folder and select Rename:
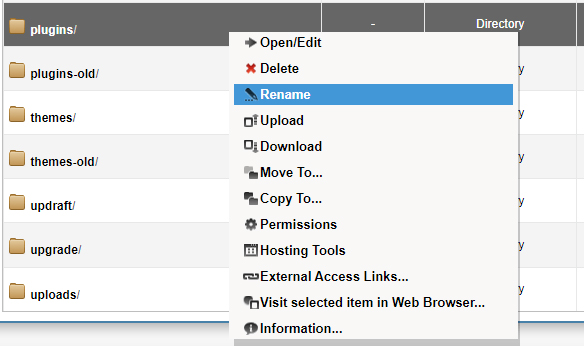
Choose a name like Plugins-rename or similar.
Usually, WordPress will search for a particular folder for installed plugins, which in the majority of cases is “plugins”. However, as there are no more such folders, WordPress won’t be able to activate any of them.
This approach is very useful – only a few clicks allow you to find out whether the issue derives from plugins or from somewhere else.
Now, try to open your website. If your website still displays the error message, then the issue is rooted elsewhere. Rename the Plugins folder to its original name and proceed with the next step in the process.
If your web pages work just fine, however, then the issue is rooted in one of the installed plugins.
If this is your case, you should do the following:
- Rename the Plugins folder to its original name and open it.
- Inside you will find folders containing all your installed plugins. Start activating and deactivating plugins individually until you find the one that doesn’t work properly.
- To do so, right-click the first plugin folder and rename it in the same manner you renamed the Plugins folder:
- Then, open your website. If it works, then you’ve found the plugin that causes the issue. If not, repeat the process for every plugin in the folder.
Although this process looks time-consuming, it is the only way to remove the plugin that causes the technical issue.
Switch to the Default WordPress Theme
If the plugins aren’t the cause of the critical error, then try switching to the default WordPress theme. This will fix the issue if there’s a problem with the code with your currently installed theme.
The idea is simple: you will delete all installed WordPress themes and upload a default one. If there was a problem with any of the deleted ones, now it should be fixed.
To do so, you should first download the theme on your computer and then upload it to WordPress via the ZETTAHOST hosting panel.
The safest default theme so far is Twenty Twenty. Download it on your computer. You should see a zip file with various files.
Now, via the hosting panel go to File Manager->YourWebsite->wp-content->themes/:
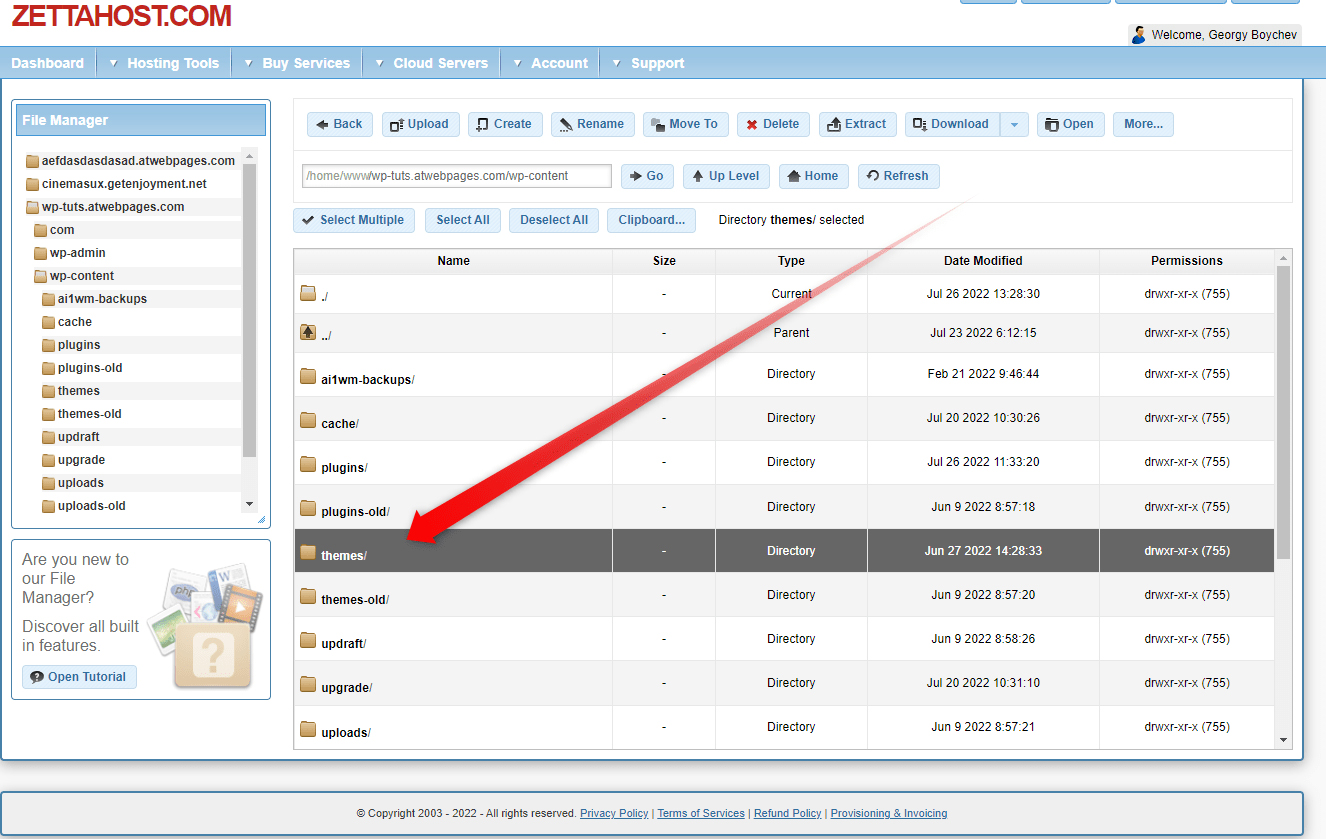
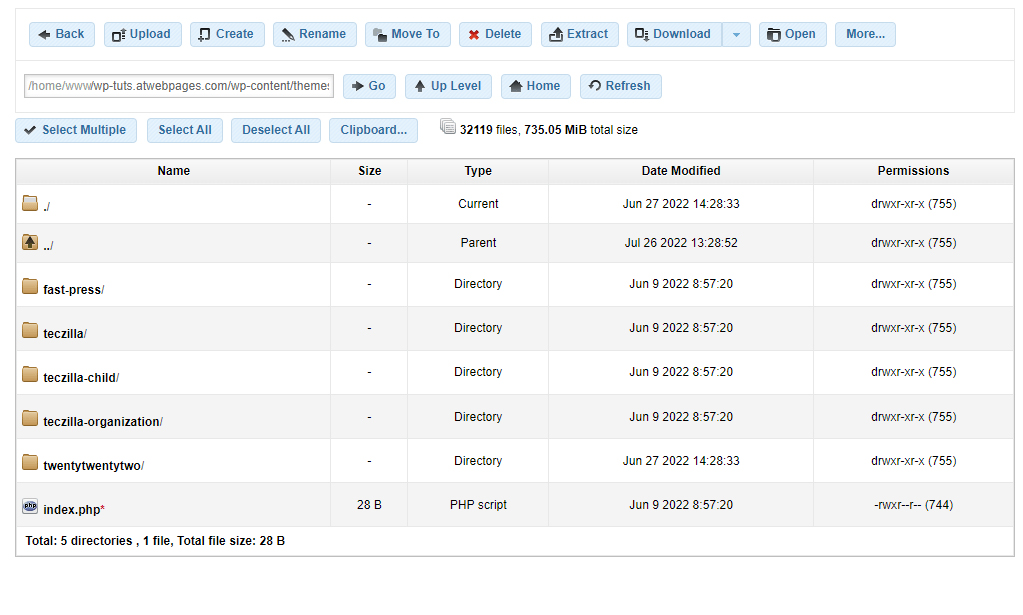
Inside this folder you will see folders with all your installed themes:
Now, select all folders and via the Download button select Download Zip:
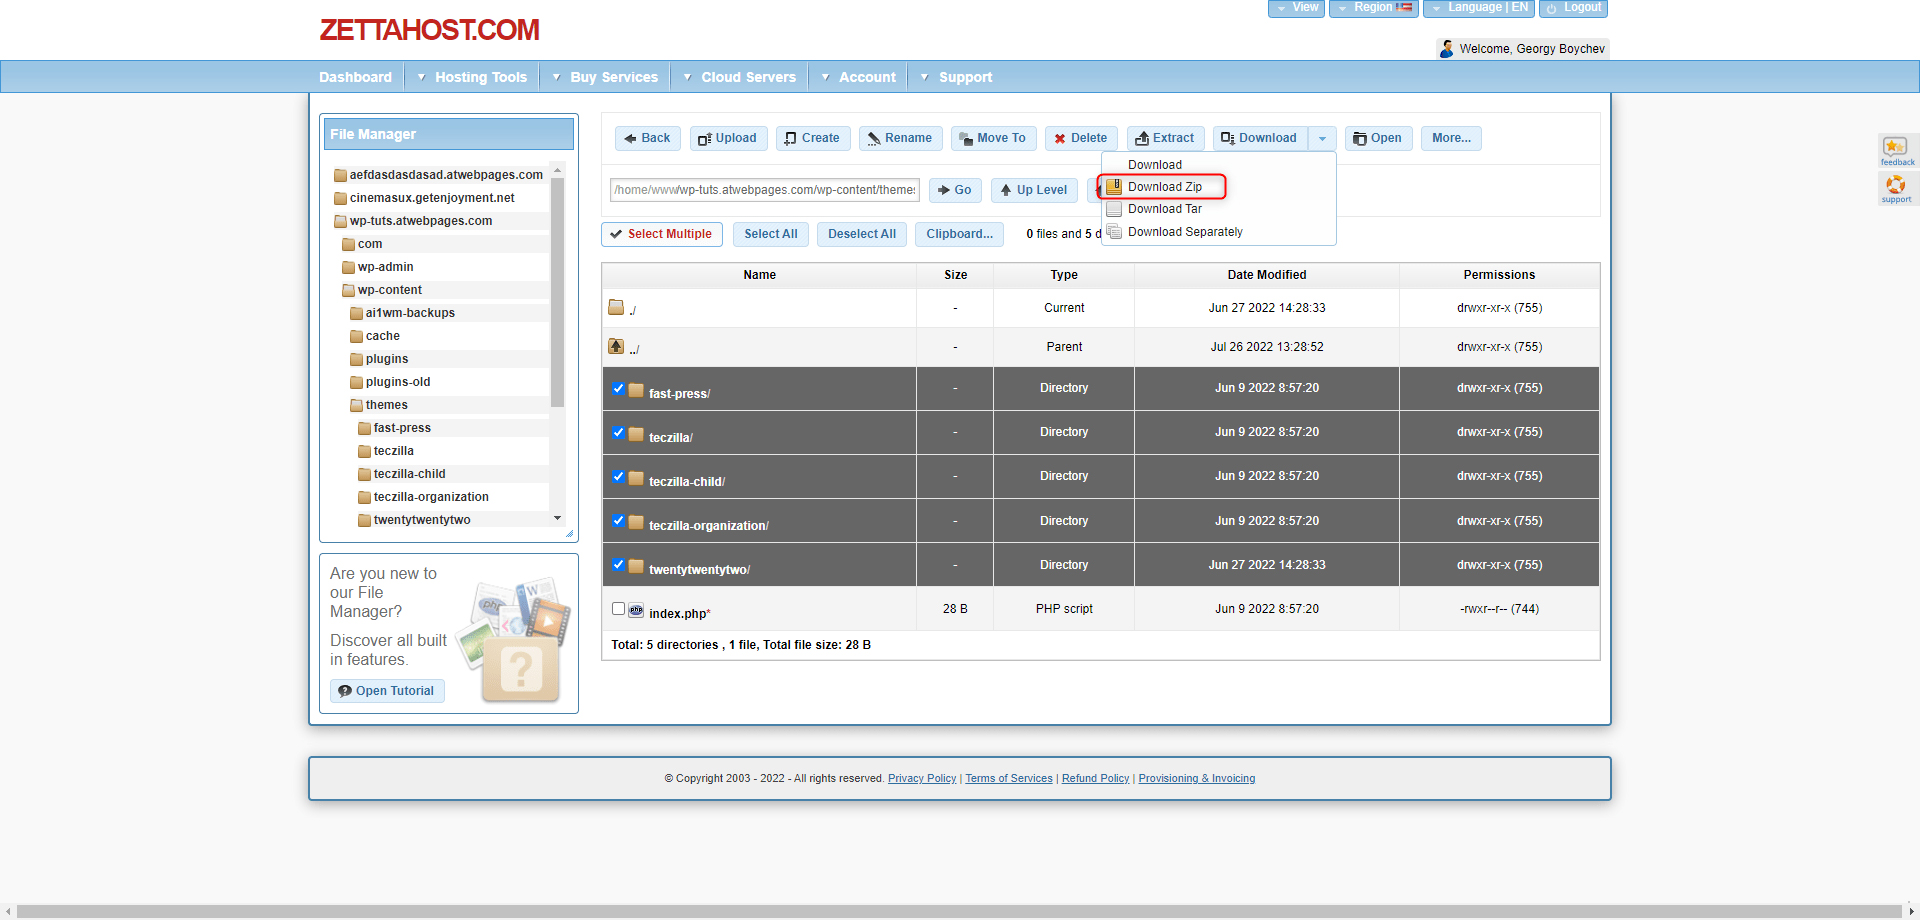
This will download a zip file with all your installed themes.
Then, delete all selected folders via the Delete button:
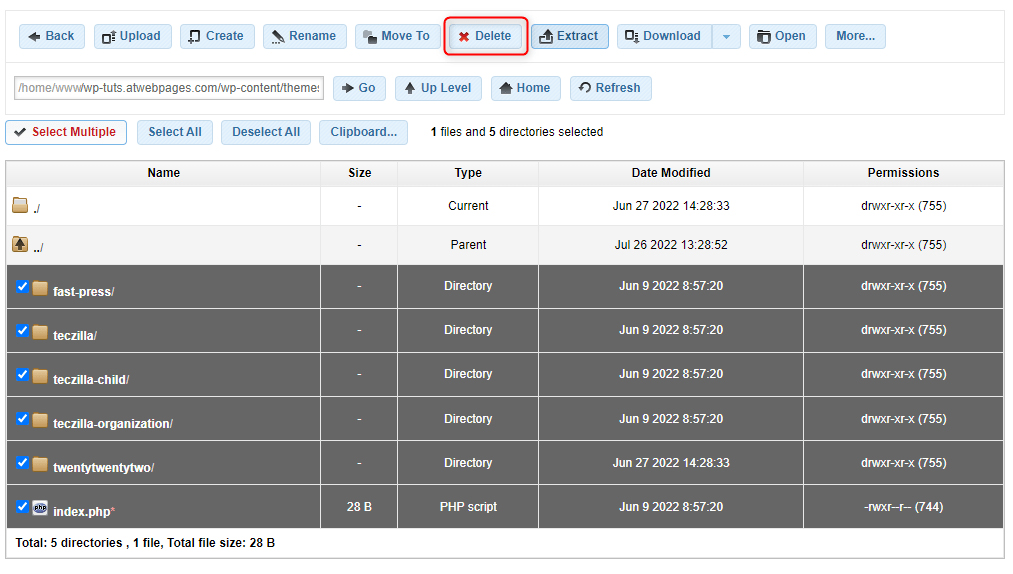
You will be able to recover all installed themes and settings in a matter of minutes.
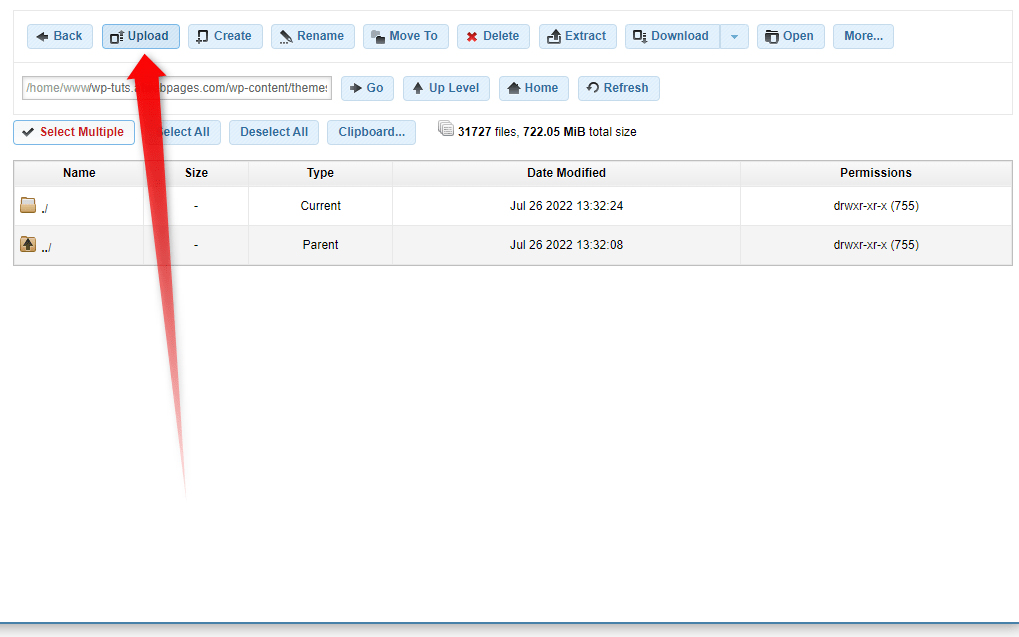
Now, upload the unzipped Twenty-Twenty theme you downloaded from WordPress.org. To do so, click on the Upload button while in the empty Themes directory and upload the zip file:
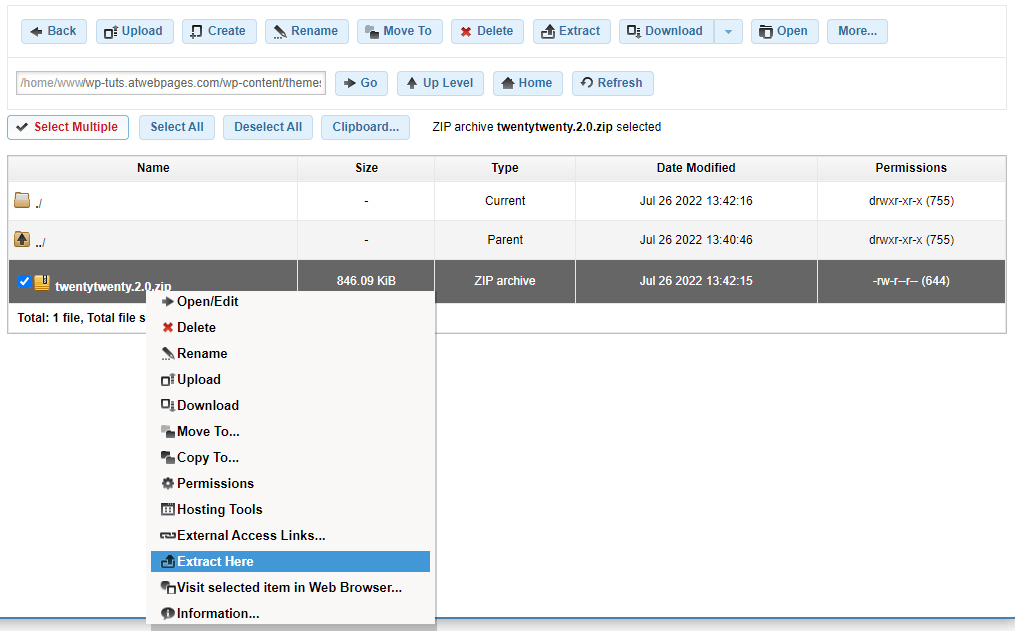
Then, right-click on the uploaded zip file and click on Extract Here:
Once the extraction process is finished, try to open your website. If it loads, then there’s a problem with some of the installed themes (the one you downloaded on your PC).
To find out which one is causing the critical error, re-upload the themes one by one and see whether you can open your web pages. Once you stumble on a theme that prompts the white screen of death, then delete it for good – it is causing the problem.
If you still receive the critical error message, however, then the problem lies elsewhere and not with your site themes.
Raise the PHP Memory Limit
The web host that contains your website works with a certain amount of RAM and sometimes WordPress sets limits to how much of this memory is used when working with PHP scripts. When this limit is exceeded, WordPress displays error messages.
To see whether this is the issue of your problem, you should raise that limit manually.
The process is very simple and requires only a few clicks here and there within the host panel.
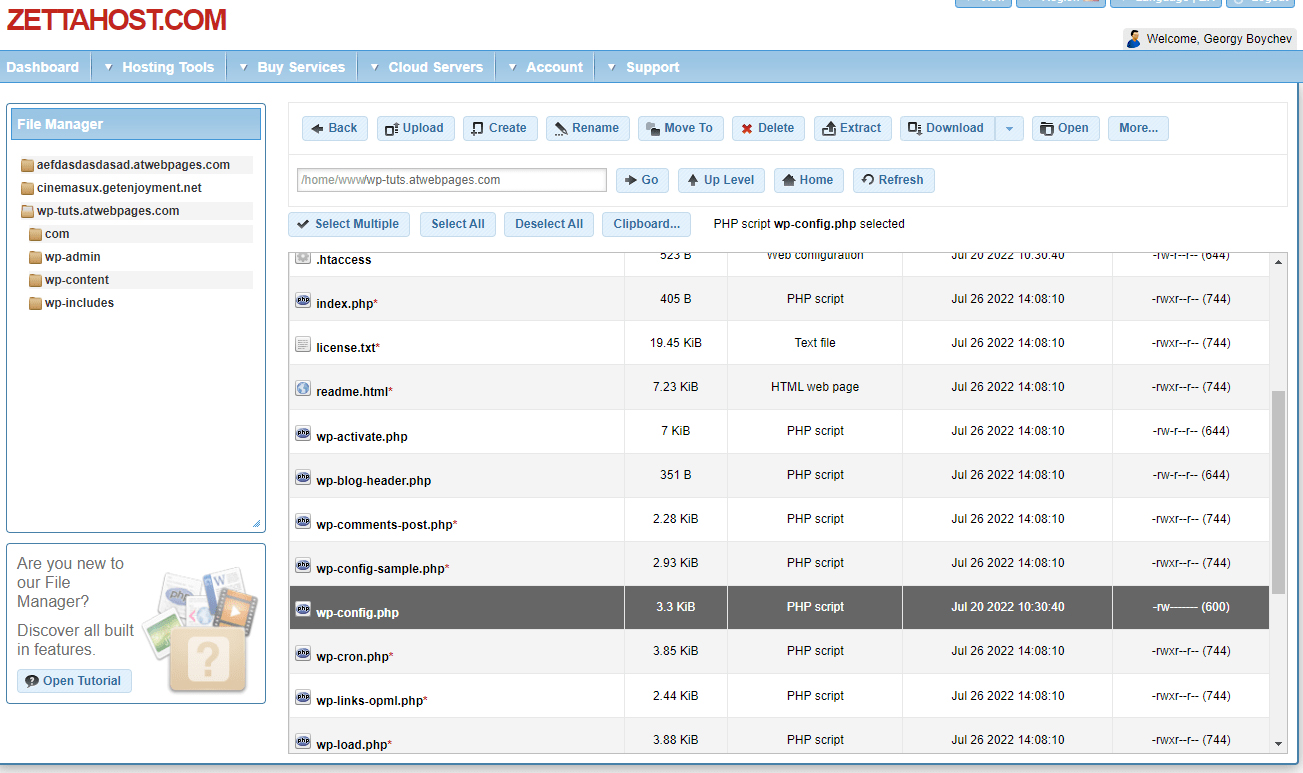
First, go to your root directory (ZETTAHOST hosting panel ->File Manager->YourSiteName->wp conent) and open the wo-config.php file:
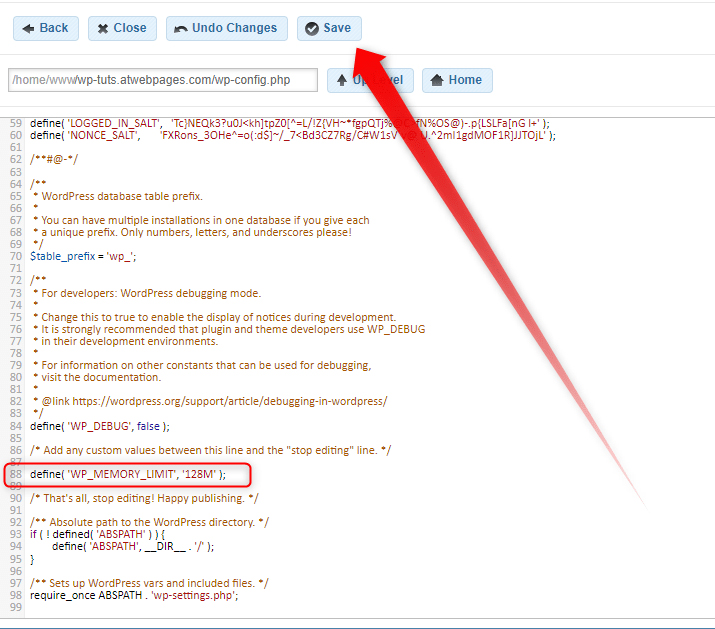
Then, scroll down to the bottom of the document and include this string of code before the final line and save the changes:
define( ‘WP_MEMORY_LIMIT’, ‘128M’ );
The changes should look like this:
Now try to open your website. If it loads – congratulations, you’ve managed to fix the issue!
If it didn’t – proceed with the next steps in the process.
Reinstall WordPress
If the previous suggestions do not work, then it is time to get more radical in your approaches.
Sometimes the issue may lie in the WordPress core. There are various reasons why the platform might stop working properly and regardless of any of them, reinstallation oftentimes can resolve the issue.
The process is simple: you should download a new copy of the platform on your computer and replace the one within the hosting panel with it.
Here’s how to do so.
First, you should download a new WordPress copy. After downloading, you will find a Zip file. Unzip it.
Then, via the ZETTAHOST hosting panel, go to the root folder of your website. This is the folder with your site’s name. Open it and click on Upload:
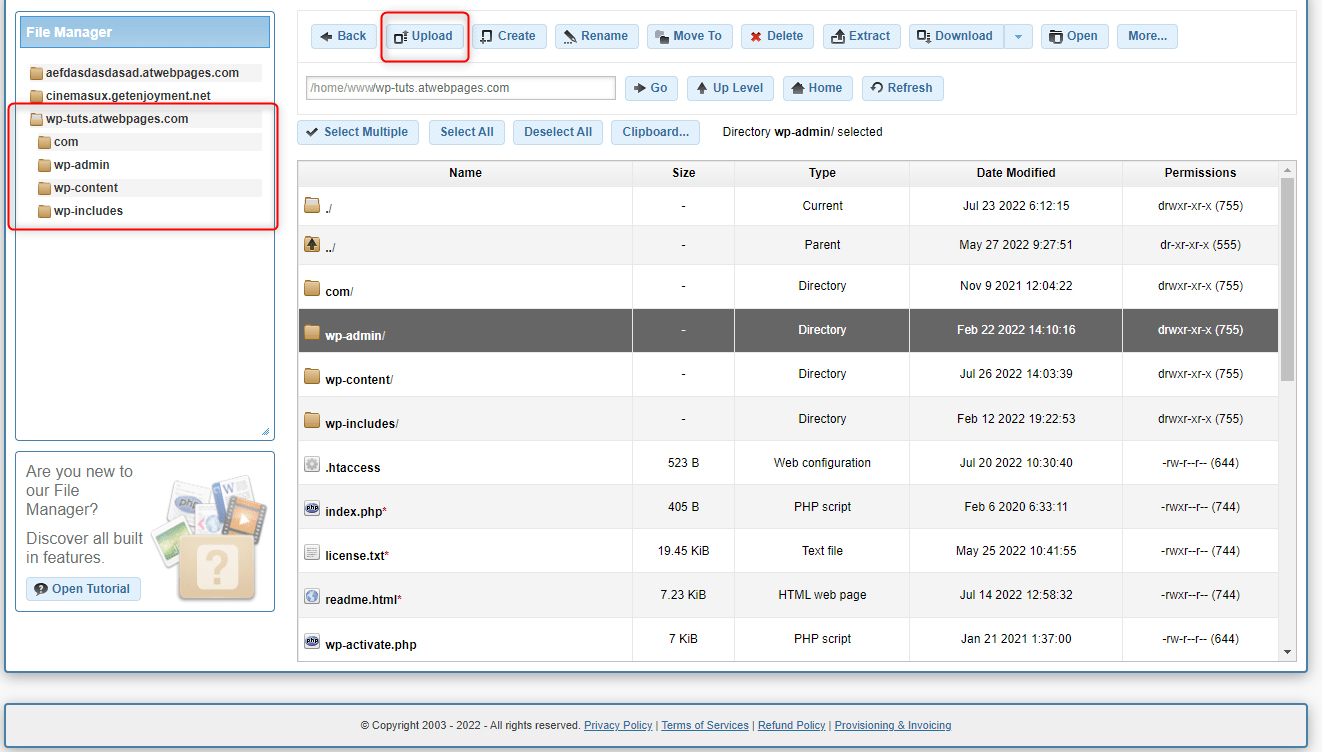
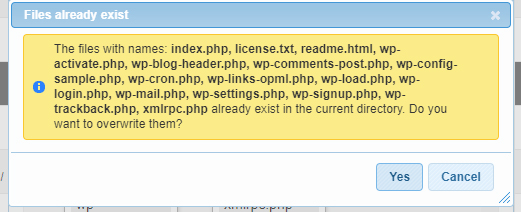
Now, select the unzipped WordPress folder you downloaded earlier and upload it. You will be notified that these files already exist and will be asked whether you wish to replace them with the ones you wish to upload. Click Yes:
Then, wait until the uploading is complete and try to open your website.
Conclusion
When you learn to build a website, you will eventually stumble upon various errors and mistakes. Although unwanted such situations can help you learn WordPress in depth and become more proficient in the site-building process.
“There has been a critical error on this website” message really is frustrating, but luckily there are various ways to fix the issue and start using your website as you normally do.
When it comes to manually tweak the platform, ZETTAHOST provides you with an exclusive user-friendly panel that helps you browse and use various features on your website without the need to delve much into technicality.
Check out our hosting services and see the benefits for yourself!
Related:
- How to Fix Error 404 in WordPress
- How to Fix Error 503 Service Unavailable in WordPress
- How to Find Broken Links in WordPress
- How to Fix 503 Service Unavailable Error in WordPress